Zucchini Pasta with Fava and English Peas

IMG_9652 
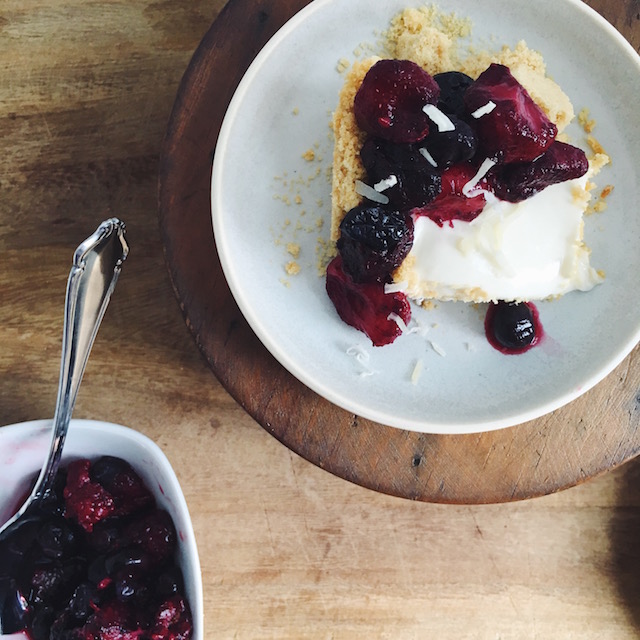
Perhaps it's due to my tiny basil plant growing in the corner of my window, or my last month's bounty of local produce; but nonetheless, I have been craving a garden-inspired dish for the summertime dinner table.

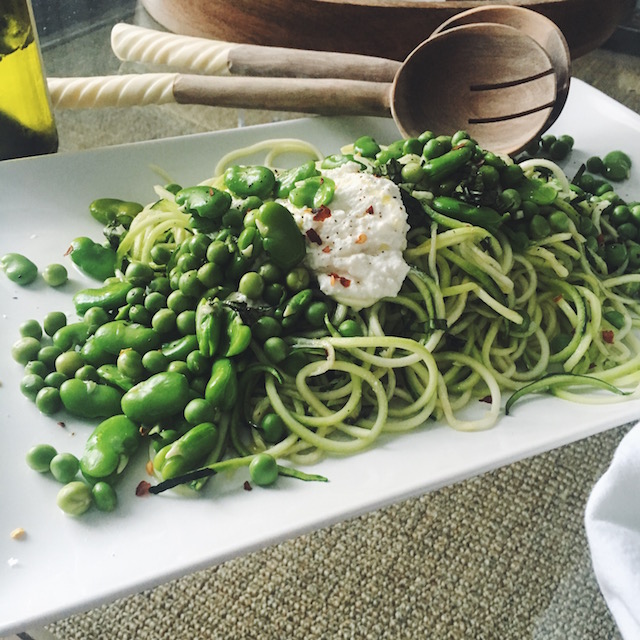
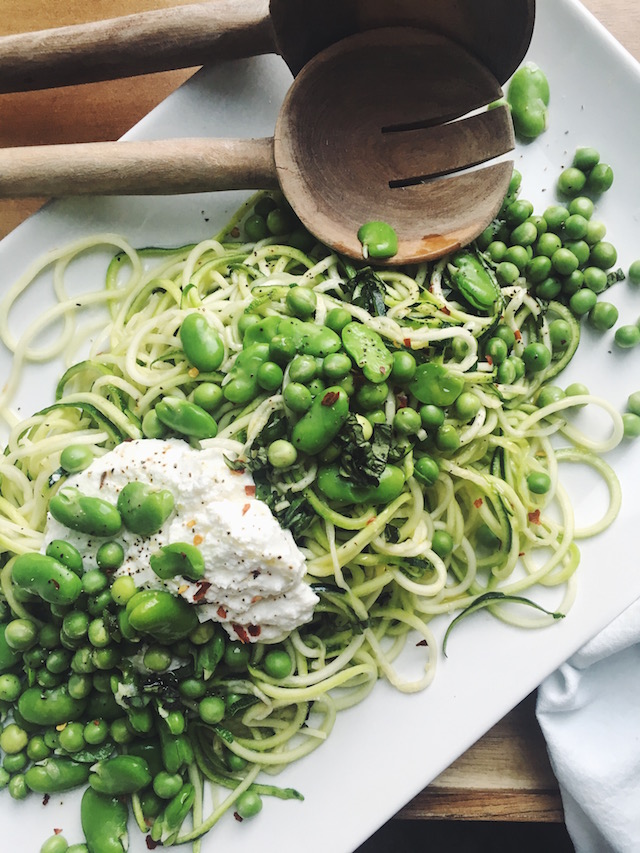
Saturday morning, I strolled 'round the corner to the farmers market. I found a bag of English peas, already peeled (yes.), and a couple of bright green zucchini. Thus, the garden pasta plan was born. Though linguine or bucatini would have been fabulous, I felt proud of the healthier spiralizer alternative in mind. P.S. If you do not yet own a spiralizer, Whole Foods offers pre-spiralized packages of vegetables!

Perfect for summer nights, even my steak-and-potatoes fiancé approved. What's your latest spiralized creation?

Processed with VSCO with f2 preset

Makes 4 servings

2 zucchini, spiralized 1/2 cup English peas 1/2 cup fava peas, peeled 1/2 cup low-fat ricotta, seasoned with salt and pepper 2 tablespoons olive oil 1 tablespoon basil, ribboned Truffle oil, to drizzle Sea salt Red pepper flakes

1. Bring a small pot of water to a boil. Prepare a small ice bath to set aside. Add fava and English peas to boiling water for 2 minutes; immediately drain and add to ice bath to stop cooking.

2. Add olive oil to a large saucepan over medium heat. Cook zucchini noodles for 3-4 minutes, until cooked through but not soggy! Turn off heat and toss in basil, sea salt, and a drizzle of truffle oil.

3. Plate zucchini and top with ricotta and peas. Sprinkle with additional basil, salt and red pepper flakes. Serve warm or at room temperature.

Processed with VSCO with f2 presetIMG_9653

Do-it-Yourself Moscow Mule Kit

FullSizeRender_1 While preparing for our March wedding, Alex and I decided right off the bat to incorporate as many tasteful food-related components as possible. I made no exception when asking my bridesmaids, who would unexpectedly receive a DIY package that'd prepare us for quite the marital toast!

This Moscow mule kit incorporates everyone's favorite houseware piece -- a copper mug -- and other fine ingredients. I purchased my mugs locally at The Stovall Collection, and the beautifully-branded ginger beer at 387 Pantry. While at Stovall, I also grabbed copper pen and cream-colored stationary for accompanying hand-written notes.

Whether for a wedding, a birthday, a dinner party hostess, or a secret Santa, the recipient of this Moscow mule kit will be shouting "Cheers!" to you!

Processed with VSCOcam with f2 preset

2 copper mugs 1 vintage ginger beer bottle 1 Tito's vodka travel-sized bottle 1 lime 1 craft box 1 bag shredded white paper

1. Place shredded paper in the box to create a padded foundation. Carefully place all ingredients and copper mug set in the box. Add a handwritten note, tie with twine, and deliver accordingly.

IMG_8259

Peach and Pesto Crostinis

Processed with VSCOcam with f2 presetSummertime patio hangouts and house parties call for the most coveted fruit of the season—peaches. The color and complexity of the ingredient stands well on its own; though when caramelized on a crostini or marinated with honey, the heightened flavors welcome a perfect sweet and savory combination. Surpass the standard presentation and test this peachy rendition, now featured in the June issue of Good Health Magazine! Processed with VSCOcam with f2 preset

Makes 8 servings

Basil pesto:

1 packed cup of basil ¼ cup pine nuts, toasted ½ garlic clove, roughly chopped Juice and zest from ½ a lemon ¼ cup olive oil A few pinches of red pepper flakes Sea salt & pepper

Crostini:

½ French baguette, sliced on the angle 1 tablespoon olive oil 2 ripe peaches, sliced Basil pesto 4 slices fresh mozzarella, halved Sea salt & pepper

1. Preheat oven to 400 degrees (or turn broiler on high). Brush crostini slices with olive oil and place on baking sheet. Bake/broil until slices are golden and toasted.

2. Spread each crostini with basil pesto, followed by peach and mozzarella slices. Sprinkle with salt and pepper. Return to the oven to lightly melt cheese and caramelize the peaches. If preferred, serve at room temperature.

Processed with VSCOcam with f2 presetProcessed with VSCOcam with f2 preset

Sweet Potato Salad

Processed with VSCOcam with f2 preset

Processed with VSCOcam with f2 preset

As recently discussed in a picnic post, I have been craving hot Southern nights under the stars and daytime dining al fresco. I find that a meaningful gathering is highly prioritized in the South, providing an opportunity to relish in hospitality and warm conversation. Southern Food Fest (May 16-22) at Whole Foods, therefore, could not arrive at a better time.

IMG_8905

IMG_8905

Whether local honey, greens, potatoes, fried chicken or butter, Southern cooking should be celebrated (and elevated). I took the challenge to transform a standard Southern side -- potato salad -- into a healthy and refreshing accompaniment to Gus's fried chicken.

How do you spin off traditional Southern sides? Or do you stick to the originals? Share in the comments. And join Whole Foods in their week-long, in-store celebration of Southern cookin'!

Makes 4 servings

2 sweet potatoes, peeled and cubed into 1-inch pieces 2 tablespoons olive oil 1 vidalia onion, peeled and cut horizonally into 1-inch rings 1/4 cup sliced scallions 1 tablespoon mustard greens 1 teaspoon ground cumin 1/4 teaspoon red pepper flakes Sea salt and pepper

1. Preheat oven to 400 degrees. Grease a baking sheet. In a medium bowl, toss potatoes in 1 tablespoon olive oil, ensuring to coat evenly. Spread in an even layer on one half of the baking sheet. Add vidalia onion slices to the other half of the sheet, keeping ring layers intact. Drizzle onion with remaining olive oil. Sprinkle baking sheet with salt and pepper.

2. Bake potatoes and onions for 30 minutes, flipping once halfway. Remove from oven and allow to cool slightly, about 10 minutes.

3. Quarter the caramelized onions, and transfer potatoes and onions to a serving bowl. Toss with scallions, cumin, and red pepper flakes. Top with mustard greens. Serve immediately or at room temperature.

Processed with VSCOcam with f2 preset

Processed with VSCOcam with f2 preset

This post is made possible by Whole Foods Germantown. Thank you for being supportive of my sponsors!

Tofu Avocado Lettuce Wraps

Daylight savings and this seriously addictive spring weather have prompted a post-work routine of River-view runs (when I'm not at Loflin), followed by creative dinners on the patio. During the last documented occurrence, I toyed with a one-pan chicken sausage sauté. This time at Whole Foods, however, the tofu caught my eye. I was initially intimidated by the cooking process of tofu, but my friend  Jeanine Donofrio appeased my suspicion through her new Love and Lemons cookbook. I felt immediately inspired by the pages' bright colors and wholesome ingredients. Here's my attempt at Jeanine's well-followed style and technique...

Processed with VSCOcam with f2 preset

Makes 4 servings

Bibb lettuce leaves 1 14 ounce box of extra firm tofu 1 tablespoon olive oil 2 tablespoons soy sauce 1 glove garlic, minced 1/8 teaspoon black sesame seeds 1/2 teaspoon sesame oil 1 lime 1 teaspoon honey Heirloom carrots, shaved Radishes, shaved 1 avocado, cubed Srirarcha

1. Remove tofu from package and slice into 1-inch cubes. Carefully blot tofu with a paper towel to remove water.

2. In a small bowl, whisk olive oil, soy sauce, garlic, sesame oil, sesame seeds, juice of a lime, and honey. Toss tofu in oil mixture and allow to marinade for 15 minutes.

3. Heat oil in a medium saucepan over medium-high heat. Add tofu in batches, ensuring that tofu pieces have at least once inch between them. Cook untouched, until pan-facing side is caramelized and golden. Flip and continue to cook. Remove tofu from pan and add remaining batches until all is prepared.

4. Layer carrots, tofu, avocado and radish on lettuce leaves. Top with srirarcha and serve.

Processed with VSCOcam with f2 preset
IMG_7154
IMG_7154

Girl Scout Cookie Crust Cheesecake

Processed with VSCOcam with f2 preset Does anyone else have an unbearable number of sleeves of Girl Scout cookies in their pantries? I managed to get a bit ahead of myself when receiving an order form from my coworker's daughter. Samoas? Sure. Thin Mints? Obviously. Shortbread? They'll go well with hot tea.

Nonetheless, I found myself with far more cookies than I needed. I searched for a solution to diminish the count of shortbread wafers on my shelf--and this cheesecake quickly solved it. Avoid the late-night cookie temptation and, instead, trot this beauty to a dinner party for others to enjoy!

Processed with VSCOcam with f2 preset

For the shortbread cookie crust:

1 sleeve Girl Scouts shortbread cookies, finely ground 1/2 stick unsalted butter, melted 1/4 cup sweetened dried coconut

1. Preheat oven to 350 degrees. Place cookies in a medium bowl and, with a rubber spatula, gently combine butter into cookie crumbs. Add coconut and incorporate.

2. Transfer cookie mixture into greased pie plate. Press firmly and evenly against bottom and sides. Bake for 8 minutes until fragrant and toasted. Allow to cool completely before filling.

For the cheesecake:

1 8-ounce package cream cheese, room temperature 1/4 cup lemon juice 1 teaspoon vanilla extract 2 tablespoons honey 3/4 cup greek yogurt Pinch sea salt

1. Whisk cream cheese until fluffy and smooth. Fold in lemon, vanilla, honey and yogurt. Sprinkle with sea salt. Pour filling into prepared crust. Freeze for two hours, or refrigerate overnight before serving with berry compote and a sprinkle of extra coconut.

Processed with VSCOcam with f2 preset

Processed with VSCOcam with f2 preset