Gazpacho (Featured on The Everyday Adventurer)

IMG_8535.jpg

IMG_8537 Last week, the Cuisinart was calling my name. . .or maybe it was the "five days left of summer" alarm going off in the back of my mind. Alas, such a calling inspired an entire day in my new kitchen with Haim Pandora station in the background and bowls and spoons in every direction.

Coincidentally, I had just been in touch with sisters Lindsey and Haley of The Everyday Adventurer, a new Austin-based lifestyle blog with a focus similar to that of Caramelized -- celebrating everyday experiences, whether a new destination or a new stylish outfit. I couldn't have been more excited to be on their blog to share my latest gazpacho recipe, which is super simple and summer-ific. Please do not let the fact that the tomatoes are pureed intimidate you -- it's a faster process than standing and dicing one at a time.

Click here for the recipe instructions and a little Q&A. Thanks for having me, Lindsey & Haley!

IMG_8533


Blistered Jalapeño Bites

Though I have lived in Austin for four years now, the not-from-Texas stereotype finally (and literally) stung during my attempt at this recipe. Jalapeños are sprinkled in my restaurant meals here and there, but never before had they entered my kitchen. Without hesitation, I slightly sliced open the jalapeños and removed the seeds with a spoon and my hands after charring them in the broiler. Then, I wiped my eyes. And my nose.

Soon enough, my face was swollen, bright red, and stinging uncontrollably! An ice pack did the trick after 30 minutes of hilarious, hysterical pain. Thank goodness these babies turned out to be tasty. But, lesson learned: WEAR GLOVES while working with jalapeños!

I served the starter on this simple dinner plate, which I set against a fun bamboo charger for a summery vibe.

photo 1

8 jalapeños 8 slices center cut bacon 1 cup shredded mozzarella 1 teaspoon fresh oregano

1. Grill (or broil) jalapeños for 3-5 minutes, until lightly grilled and blistered. With a sharp knife, cut a 2-inch line into the jalapeño and remove seeds with a spoon.

2. Mix mozzarella and oregano in a bowl, then stuff a large pinch of the mixture into each jalapeño. Wrap a piece of bacon around the jalapeño tightly to seal the mozzarella inside of the pepper.

3. Grill jalapeños until bacon is browned, approximately 5 minutes. Serve warm.

adapted from food network

Hatchery Box Honey Spring Carrots

Snail mail is unmistakably one of my favorite things in the world. Its tangible satisfaction etches on my memory like a ballpoint pen on fine paper (which I rarely see these days). The usual cardboard package excites me for the remainder of the day upon which I receive it; so you can imagine my feelings of elation when seeing a bright red box on my doorstep.

Oh yes, Hatchery had finally arrived.

This month's ingredients touched destinations across the country, from New Orleans and Atlanta to Brooklyn and Vermont. It's impossible to pick a favorite due to the purposefully multi-varied flavors and textures for recipe enhancement. But I did quickly find the jalapeño garlic olive oil (top right) from family-owned Calivirgin in Lodi, CA to become a true cooking essential. The unfiltered, bold flavor is just enough to upgrade a filet of tilapia or a vegetable medley.
A quick overview of the other culinary goodies...
  • Strawberry Chipotle Jam from Potlicker Kitchen (you'll love the smoky undertones)
  • Sweet and Smoky Sauce from Causey's BBQ (sweetened with molasses and brown sugar)
  • Ohia Lehua Honey from Big Island Bees (see recipe below!!)
  • Original Blend Spice Rub from Ole Man's 
  • Fuego Salsa from La Fundidora

The delicate and uniquely creamy Big Island Bees honey is made from an exclusively Hawaiian Lehua blossom. With spring's suddenly sweet entrance and the iconic Easter holiday right around the corner, I thought I'd sweeten up a symbol of the new season (rainbow ones, in fact!) with simple instruction and unforgettable taste. One teaspoon of this essential Hatchery ingredient will provide the ultimate complement to any picnic, Easter feast, or spring dinner party.

Oh, and if you're feeling generous - or anxious to treat yourself - gift with my newest favorite foodie essential!

honey glazed rainbow carrots

Makes 2 servings
8 rainbow carrots, trimmed and peeled
1 teaspoon Big Island Bees Ohia Lehua Honey
1/2 teaspoon rosemary
1 teaspoon olive oil
Sea salt and black pepper
1. Preheat oven to 350 degrees. Line a baking sheet with foil. Add all toppings to a small bowl and heat in the microwave for 15 seconds to melt honey.
2. Place carrots evenly on baking sheet and brush honey glaze on each carrot with a pastry brush. Bake for 20 minutes, stirring carrots once half-way through baking. Serve immediately.

*This post was in partnership with Hatchery. Thank you for being supportive of my sponsors!

Cauliflower Crust Pizzas

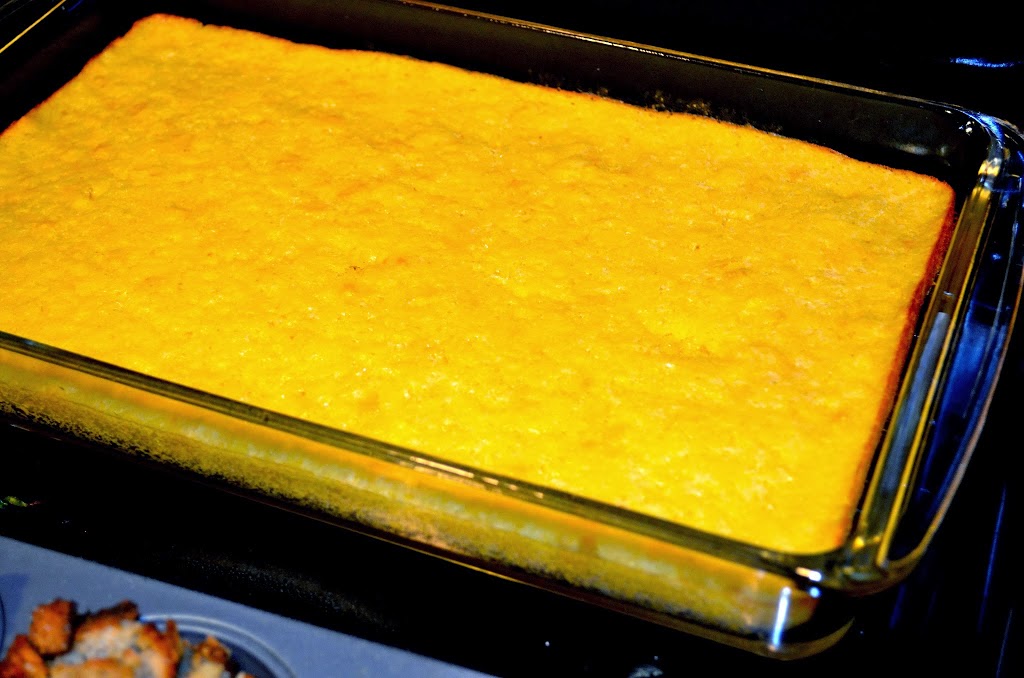
If you thought pizza epitomized carbs, think twice. Rather than a single slice costing you 400 calories, this entire 9x13 inch carb-less crust (which six of us could barely finish!) adds up to approximately 434 calories total, according to lifestyle icon Lauren Conrad. With inspiration from my Twitter pal Hannah Orlansky and motivation from my friends in Austin to keep our meals on the healthy(ish) side, we opted to try a cauliflower recipe in hopes that the substitution would garner the same satisfying reaction of typical crust. While I missed the crunch of toasted bread, I patted my back with pride after every bite. Healthy cauliflower trumps greasy carbs any day!
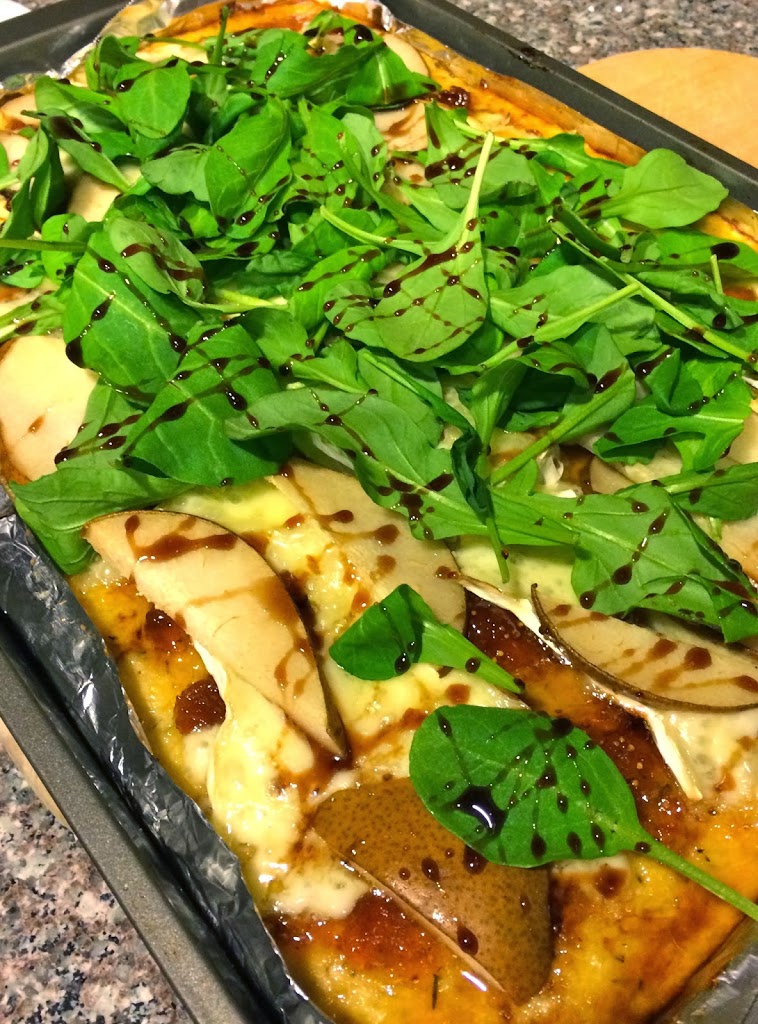
Below are our three variations of pizzas: classic margarita, brie & fig, and chicken sausage with peppers & onions. With my obvious sweet tooth, I preferred the brie preparation. Those smoky sausage bites and rich mozzarella & tomato slices were hard to pass up, though! Share any of your creative topping combinations with me -- how do you like your cauliflower pizza?
cauliflower crusted pizzas

Makes 1 pizza
1 large head cauliflower (3 cups riced cauliflower, see directions below)
1 1/2 cups shredded mozzarella
3 eggs
1 teaspoon dried oregano
1 teaspoon garlic salt
Olive oil
For Brie & Fig:
1 cup arugula (add this after cooking!)
1 tablespoon balsamic reduction (add this after cooking!)
3 tablespoons fig spread
4 ounces brie
1 green pear
For Margarita:
1 large heirloom tomato
4 ounces fresh mozzarella
Olive oil
Black pepper
For Chicken Sausage & Onions:
2 links organic chicken sausage
1/2 onion, caramelized
1/2 bell pepper, caramelized
4 ounces fresh mozzarella
1. Remove stems and leaves from cauliflower. Pulse in food processor until it looks like a grain. Place in a microwave-safe bowl and heat for 8 minutes (the natural moisture in the cauliflower cooks itself). Measure 3 cups of microwaved cauliflower for recipe; store the rest in refrigerator for up to one week.
2. Preheat oven to 450 degrees. Grease cooking sheet with Pam or aluminum foil.
3. Mix microwaved cauliflower with eggs, mozzarella, garlic salt and oregano. Spread mixture on cooking sheet into an even rectangle. Lightly brush olive oil on top.
4. Bake for 15 minutes. Remove from oven and cover with desired toppings. Place back in oven until cheese melts, about 5 minutes!
adapted from lauren conrad

Uchiko-inspired Brussels Sprouts

Camille-Uchiko-7.jpg
True foodies, from my knowledge as a food fanatic and lifestyle blog intern, seem to find the utmost joy in occasions ranging from a well-crafted cheese board (guilty) to a new restaurant sighting (extra guilty) and an opportunity to meet culinary professionals (yet again, guilty).
When I received an invitation to attend Camille Styles' sushi-making field trip at Uchiko, my foodieness hit a whole new level. Is that even possible for me? I'm not quite sure. But it happened. Chad Wadsworth captured the unforgettable evening in Uchiko's private dining room with sake sipping, sushi rolling, and mingling with Uchiko chef de cuisine and staff.
Coincidentally, my friend Hannah Hausmann just sent me the recipe for these Uchiko-inspired brussels sprouts. Might I add that Uchiko's original version is worth the visit on its own. Enjoy a taste of Uchiko in your own home...and thank you for sharing, Hannah!
uchiko-inspired brussels sprouts

1 pound brussels sprouts
3 tablespoons grapeseed or canola oil
1⁄2 teaspoon sea salt
3 tablespoons sugar
3 tablespoons Asian fish sauce
2 tablespoons fresh lemon juice, plus extra for seasoning

1 heaping teaspoon Sriracha hot sauce
1 clove garlic, crushed 1⁄4 teaspoon black pepper

1. Preheat oven to 400 degrees.

2. Trim the sprouts by cutting off the stem end & peeling back a layer of leaves. Cut any large sprouts in half. Rinse sprouts in a bowl of cold water, and dry them with a clean towel.

3. Place sprouts in a single layer on a foil-lined cookie sheet and drizzle with oil. Toss to coat, and sprinkle generously with salt.

4. Bake for 45-55 minutes, stirring after 20 minutes, until crispy and tender. The outer leaves should be very dark, and the sprouts will be tender and fragrant when they are finished cooking.

5. During last 10 minutes of cooking, place sugar in a 12-inch frying pan over medium/high heat. Stir frequently with a wooden spoon until sugar is melted and amber colored. This should take about 2 – 3 minutes. Add 1⁄2 cup of very hot water (mixture will bubble), and stir until caramelized sugar is completely dissolved.

6. Stir in fish sauce, lemon juice, Sriracha, garlic, and black pepper. Continue to cook, stirring constantly, for 4-5 minutes, until mixture reduces. Remove from heat and set aside.

7. Arrange cooked Brussels sprouts on a serving dish and top with warm vinaigrette. Taste and season sprouts with additional lemon juice, salt and pepper before serving.

adapted from austin gastronomist

Corn Soufflé

DSC_0268.jpg
Corn soufflé is indeed a Thanksgiving tradition in most households; but I bet you've never made yours with vanilla yogurt? My roommate Ashley made her family favorite at our roommate Thanksgivukkah feast, and I couldn't get enough of it. I think you'll feel the same way.
corn soufflé
1 stick butter (1/2 cup), melted
1 can regular corn, drained
1 can creamed corn
1 7-8 ounce box corn muffin mix (I recommend Jiffy)
2 eggs, slightly beaten
1/2 teaspoon vanilla extract
1/2 cup yogurt (If you use vanilla yogurt, nix the extract)

1. Preheat oven to 350 degrees.
2. In a large bowl, mix in two cans of corn with egg. Add corn muffin mix and stir until well blended. Add melted butter and yogurt.
3. Place in a greased soufflé pan for 30-35 minutes.
recipe courtesy of ashley sterbcow